Getting started with XSplit Last updated at 2022-06-11 20:39:42
Hello hello! This one is for all of you XSplit users. This is a quick guide that will teach you how to connect SMG to XSplit to display your current playing music on your stream. To connect SMG with XSplit, you need to add a text source to your scene, which is configured to read from a file generated by SMG.
If you already installed SMG, you can skip ahead to "Adding a music ticker to XSplit"
- Installation
- Setting up your music player
- Adding a music ticker to OBS
- Styling the music ticker
- Getting help
Installation
After you purchased SMG, you will have received a license key, and you can install SMG. Start by, downloading the latest version of SMG. The installer guides you through the process of installing.
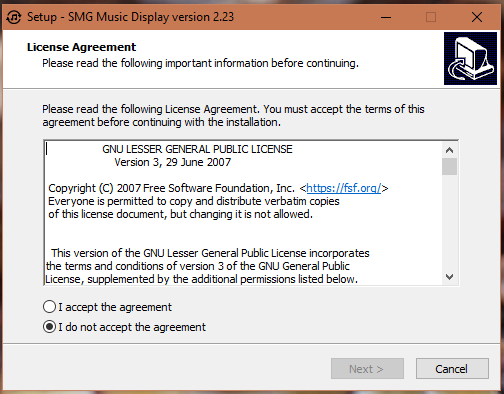
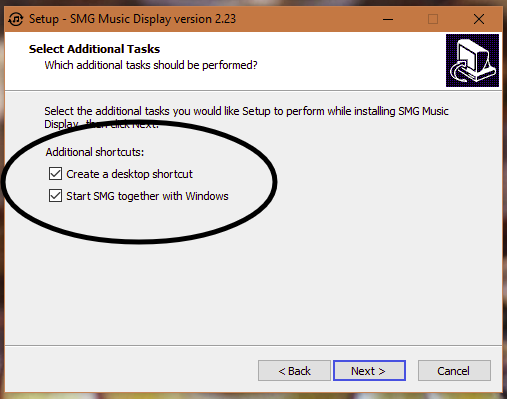
Read the license agreement, accept it after you've read it. On the last screen, there's an option to let SMG start-up along with Windows, so you don't have to start it up manually every time you stream. It's recommended to check this box if you stream regularly.
Setting up your music player
To get started with sharing music, you'll first need to pick your music player. We'll start with Spotify, but for this guide you can use any other music player as long as they're programs downloaded to your computer, and not websites like YouTube, Soundcloud, Pandora or TuneIn.
First of all, open Spotify and play your favorite song.
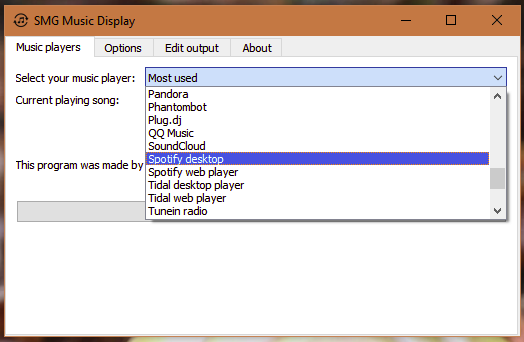
Next, open SMG and select 'Spotify Desktop' from the select your music player dropdown menu.
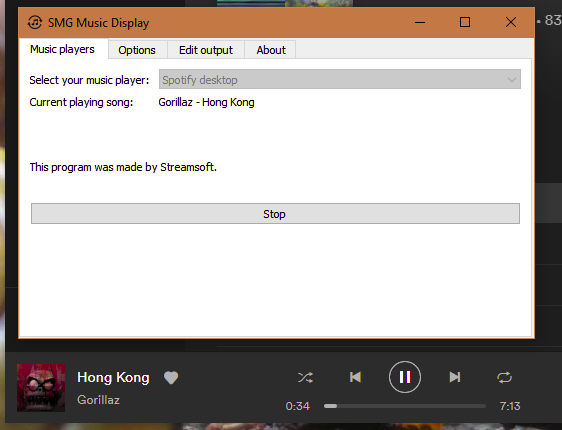
Press start, and SMG should show you what song is playing in Spotify.
The process is the same for any other music player, start a music player, select the player in SMG, and press start.
Note, SMG remembers what music player you selected last time.
Adding a music ticker to XSplit
- First, open XSplit. Click the Add Source button, and select Text.
- A configuration popup will open, in this popup, click on the "Script" button, and change the selection from "Clock" to "Load Text from Local File".
- Next, click the little cog icon next to it, and another popup will open. Within this second popup, you'll need to configure the "File Path", click the ... and navigate to your SMG Music Display installation folder, this is C:/Program Files(x86)/SMG Music Display/current_song.txt by default.
- After you've configured the file path, you need to configure "Behavior on Line Breaks" to "Preserve Line Breaks".
- Finally, click the "Update Text" button to save your configuration, and press "OK" to finish setting up the Text source.
That is all that's needed to configure XSplit for SMG. Once you've finished the configuration, you can style, position and resize the text as desired for your streaming set-up.
Styling the ticker
At this point, the music ticker is working but it's not very stylish. You can personalize the ticker by going back to the text source's options. How you style the ticker is entirely up to you.
You have options to resize the text, choose a different font, color etc. You can refer to XSplit's official documentation for additional help on styling.
A common thing streamers want is to scroll the text automatically so that no matter how long the song name is, it's always readable in full. To do this, open your Text Source settings and go to the "Styles" tab. Select Animation, it has sensible defaults, but you can change them if you want, the most usual behavior is to let it scroll from left to right.
For additional information on how to configure your text exactly as you want, you can check out , or check YouTube for additional tutorials.
Getting help
For additional help, you can reach out via Twitter or send an e-mail to smg@smgmusicdisplay.com